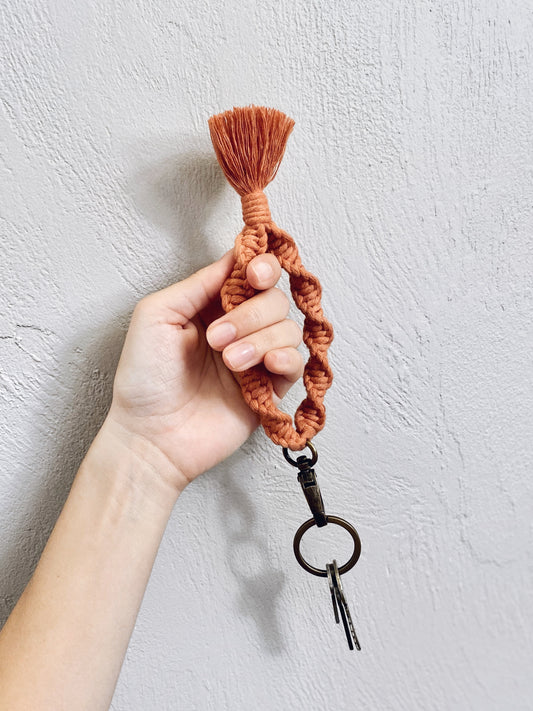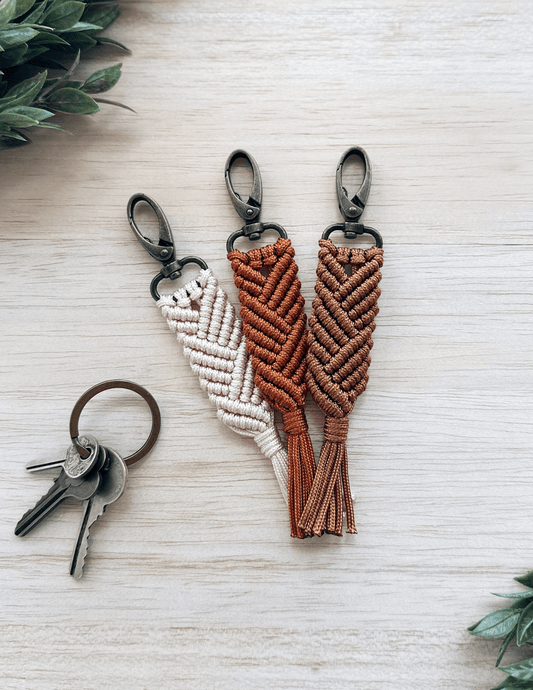

Want to make a macrame keychain that looks really good?
How about one that turns out so great that you can’t stop admiring it?
You really can - even if you’re a total macrame beginner!
I’m sharing my best macrame tips and secrets, PLUS a step-by-step tutorial so you can make the Arizona paracord keychain yourself (and feel great about your crafting skills).
This keychain design is pretty, durable, and easy to make - even if you don’t have any macrame experience at all. Ready to find out how? Read on for all the details.

The secrets to making your own DIY macrame keychain
If you’re anything like me, you find it easy to get frustrated with unclear instructions and fussy, complicated projects.
So, I want to share my macrame tips and tricks that are going to set you up for success and help you get over that first hurdle of starting to learn a new craft.
The instructions below go step-by-step, explaining the process from beginning to end, with plenty of detailed pictures and even bonus tips.
What makes this macrame keychain the perfect fiber art DIY project for beginners?
Keychains are a great macrame project to start with because they’re useful and quick to complete - AND you get to carry them around everywhere to admire your amazing handiwork. 😉
Plus, they can make sweet little presents for your loved ones.
But what makes this pattern extra beginner-friendly?
1) The cord type.
This design uses a cord type called paracord that is flexible and easy to work with, and that doesn’t have a lot of stretch to it. 
This makes it easier to get your knot tension right, which in turn makes your knots consistent and the overall design look sleek and polished.
Paracord has the extra benefit of being exceptionally durable - it was originally designed for military purposes, including the manufacture of parachutes. So your new macrame keychain is going to last longer than a typical cotton one.
2) The knot style.
This pattern uses tightly-formed knots that sit close together, meaning that you don’t have to worry about spacing your knots out correctly or consistently (which can take a lot of practice to learn).

Each knot that you make will sit snugly next to the one before it, forming a design that looks tidy and skillfully done.
So even if it’s your first try at macrame, no one will know!
Already hooked on this keychain design? Save this post to your crafting board on Pinterest so you can find it later or share it with your crafty friends.


How much will this project cost to make?
As long as you have some basic tools on hand already (scissors, candle lighter), you can make this project for under $7 (USD).
How long does this project take to make?
It will depend on your level of expertise, but for most people (even beginners), this keychain can be made within about 30-45 minutes.

The more keychains you make, the faster you’ll get.
Where can I buy the supplies?
For this project you'll need paracord and a metal keychain hook.
Paracord
You can often find paracord at your local craft store, and there are more options online.
Search for “95 paracord,” as that will give you the right thickness for this project.
You can also try a slightly thicker cord such as 275 paracord, but you will get a significantly chunkier-looking keychain.
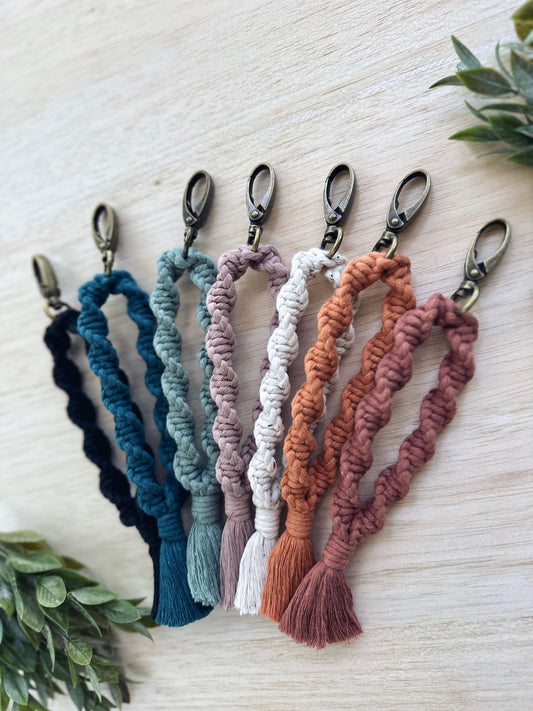
You’ll need two cord colors for this project, at least six feet of each color. (Or you can make it with just one color if you prefer - so 12 feet total.)
Here are a few sources for paracord:
- Hobby Lobby
- Joann Fabrics
- Paracord Planet (huge color selection)
- Bored Paracord (also has a large color selection)
Keychain Hooks
For your keychain hook, you want to search for a “swivel hook” or “swivel snap hook” or “swivel clasp”. Most importantly, you’ll want a hook that has enough space for your cords to attach to.
Here are some examples. The hook that I’ve used in the pattern pictures (below) is 3/4” wide (19 mm), which I've found is a great width for this project.

Here are a few sources for keychain hooks:
- Michaels
- Joann Fabrics
- Goldstar Tool (best selection I’ve found)
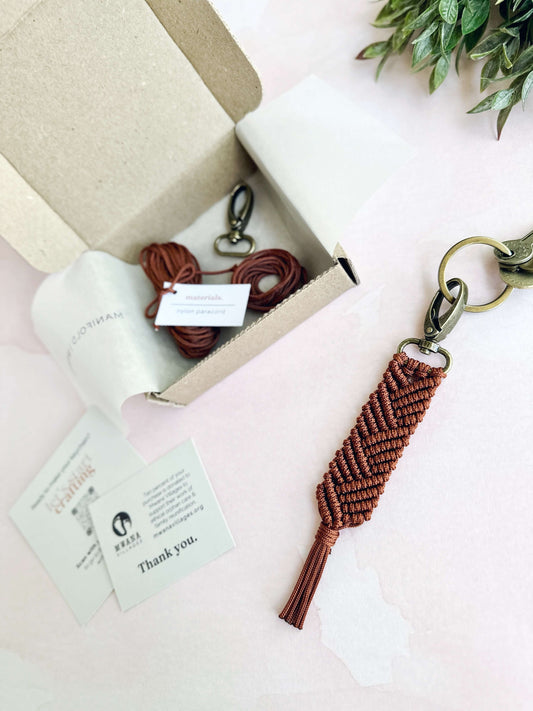
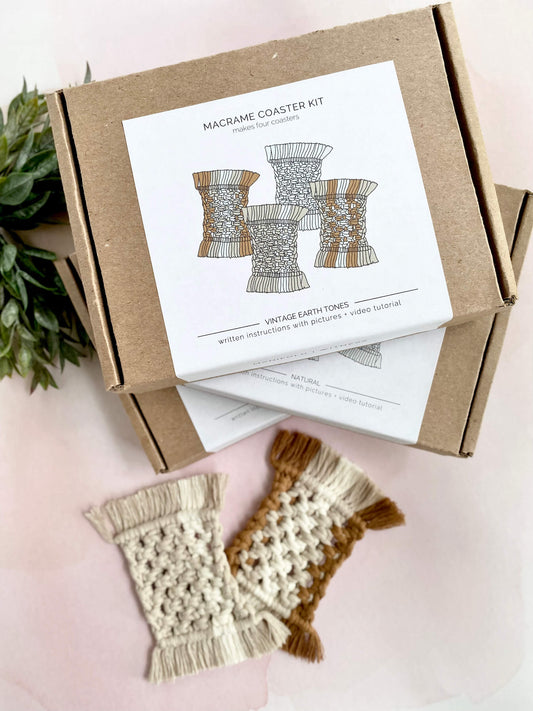
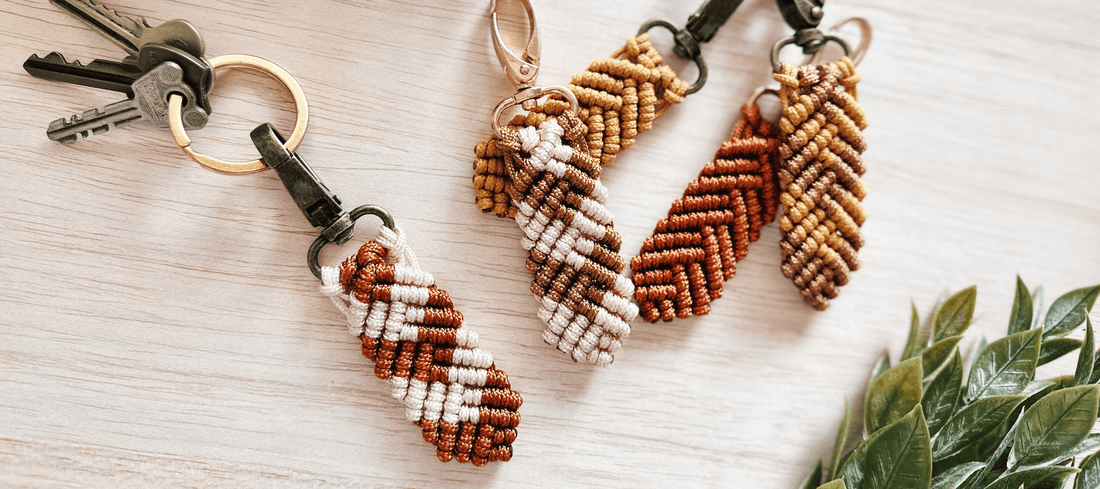
TIP: If you don’t want the hassle of finding your own macrame supplies, check out my DIY macrame kits, which come in different beginner-friendly designs, from keychains to coasters. Each kit includes step-by-step instructions, a video tutorial, and all the supplies that you’ll need for the project. (Pictured below: the Quinn paracord keychain kit.)

Want to make this project even more fun?
One last tip before we start knotting - and this is my favorite one.
This macrame project gives you a great excuse to gather your friends and enjoy a fun afternoon or evening together. Stock up on different colors of cord, or have everyone bring their favorite cord color(s).
Pop a bottle of bubbly, pull up some chairs around the table, craft your own keychains together, and celebrate your creative side!
This is also a sweet project to make together for a birthday party, bachelorette party, or bridal shower.
Now let’s move on to the full, step-by-step instructions for making your DIY macrame keychain.
What You’ll Need

- Two colors of 95 paracord - 6 feet /1.8 m of each color (see my shopping tips above)
- 1 metal keychain hook, about ¾” inch wide / 19mm wide (see my shopping tips above)

- Sharp scissors
- Candle lighter (long style works best)
- Measuring tape or yardstick/meter stick
- A flat surface to work on. This can be a tabletop (you’ll need masking tape to anchor your project while working) or a cork board (you’ll need push pins).
Please note: This project is NOT recommended for children, since it requires the use of open flame to melt the cord ends.
Making Your Macrame Keychain
1. Cut your cord lengths:
- 2 pieces of color A, each one 3 feet /91 cm long
- 2 pieces of color B, each one 3 feet/ 91 cm long

2. You’ll start your knots by taking a piece of color A and making a lark’s head knot to attach it to your keychain hook. First, pick up the cord and fold it in half.

3. Pass the folded end through the keychain hook to make a loop.

4. Make sure the two cut ends of the cord are even. Tuck the two ends of the cord through the loop, and pull them all the way through. Pull to tighten the knot. Slide it to the left side of your keychain hook.


5. Repeat the lark’s head knot using both pieces of color B. Then finish up with the last piece of color A.

6. Now pin or tape the keychain hook to your work surface.

7. Next you’re going to make a diagonal row of double half hitch knots, starting near the middle and going toward the left side of the keychain. Mentally number your cords from 1 to 8, left to right.

8. Take cord 5 and pull it down and to the left. This will be your first base cord and you’ll knot the other cords around it.


9. Now pick up cord 4. This will be your first knotting cord.

10. Loop your knotting cord up and over your base cord, and then back through to form your first knot. Pull the knot tight.


11. Repeat using the same two cords. Loop the knotting cord up and over the base cord, and then back through to form the knot. Pull tight. You should now be able to count two small loops along your base cord. You’ve just finished your first double half hitch knot.


12. Keeping the same base cord, now pick up cord 3. This will be your next knotting cord. Repeat the steps above to make a new double half hitch knot. You’ll now have four small loops along your base cord.


13. Keeping the same base cord, pick up cord 2. Make another double half hitch knot.


14. Once again keeping the same base cord, pick up cord 1. Make one more double half hitch knot to finish up this row. When you’re done, you should be able to count 8 small loops along your base cord.


15. Now you’re going to make a row of knots going in the other direction, from near the center toward the right side of the keychain. Straighten out your cords and again mentally number them. Pick up cord 5 and pull it down and to the right. This will be your new base cord.


16. Pick up cord 6. This will be your next knotting cord. Loop cord 6 up and over your base cord, and then back through to form the first part of your double half hitch knot. Repeat with the same two cords to finish your double half hitch knot.


17. Next, keep the same base cord and pick up cord 7. Make another double half hitch knot.


18. Again, keep the same base cord and pick up cord 8. Make one more double half hitch knot to finish this row. You should be able to count 6 small loops along your base cord.


19. Now you’ll make another row on this same side, just below your last one. Straighten out your cords and mentally number them. Pick up cord 4 and pull it down and to the right. Using cords 5-8 as your knotting cords, make four more double half hitch knots. When you’re done with this row, you should be able to count 8 small loops along your base cord.


20. Straighten out your cords again. You’re going to move back to the left side and make two more rows of knots. First, pick up cord 4 and pull it down and to the left. This will be your next base cord.


21. Then use cords 3, 2, and 1 to make double half hitch knots. You’ll have six small loops along your base cord.


22. Next, pick up cord 5 and pull it down and to the left. This will be your next base cord.


23. Use cords 4, 3, 2, and 1 to make double half hitch knots. At the end of this step you’ll have eight small loops along your base cord.


24. Now repeat steps 15 through 19 to make two more rows on the right side.


25. Repeat steps 20 through 24 to make two more rows on the left side.

26. Repeat steps 15 through 19 to make two more rows on the right side.

27. Repeat steps 20 through 24 to make two more rows on the left side.

28. Repeat steps 15 through 18 to make just one more row on the right side.

29. From now on we’re going to gradually reduce the number of knots in each row so that the keychain shape will taper off to a point. Instead of making another full row on this side, use your usual base cord (cord 4) but only use cords 5-7 this time to make your knots. Leave cord 8 unknotted. You’ll have six small loops along your base cord.


30. Move to the left side and use cord 4 as your base cord. Then use cords 3 and 2 to make double half hitch knots. Leave cord 1 unknotted. You’ll have four small loops along your base cord.


31. Still working on the left side, use cord 5 as your base cord. Then use cords 4 and 3 to make double half-hitch knots. You’ll have four small loops along your base cord.

32. Moving back to the right, use cord 5 as your base cord and make a double half hitch knot using only cord 6 this time.

33. Finally, use cord 4 as your base cord and make a double half hitch knot using cord 5. Your knots are done! This is a good time to pull on the end cords of your keychain and make sure that the knots are nice and tight.


34. Now it’s time to trim and melt the ends of your keychain. Using sharp scissors, cut the remaining cords close to the bottom of your knots.


SAFETY NOTES:
Perform the next two steps in a well-ventilated area.
Do NOT perform these steps if you are using a cord type other than nylon paracord, as other types of cords will not melt, and may catch fire.
To avoid burning yourself, do not touch the cord ends until they are completely cooled.
35. To melt the cord ends and keep them from unraveling, you’ll use the candle lighter. Bring the end of the cord very close to the base of the flame, but do not touch the flame to the cord. You want to slightly melt, but not singe, the cord end. Repeat for each cord, until all the cord ends are melted.


36. After the cords have completely cooled, press the end of each cord up into the keychain. If you’ve cut/melted your cords short enough, the ends will be almost invisible when you look at the front of the keychain, as shown below.


That’s a wrap
What do you think? Are you hooked on paracord keychains yet? (I won’t even tell you how many I own, now that I know how cute and durable they are to carry, and how fun and easy they are to make!)
I’d LOVE to see your keychain results - leave a comment below or follow me on Instagram to share your crafting victory.

> > > P.S. If you like a tassel at the end of your keychain, check out my Quinn keychain pattern, available in The Pattern Shop.